Apache Spark has a useful command prompt interface but its true power comes from complex data pipelines that are run non-interactively. Implementing such pipelines can be a daunting task for anyone not familiar with the tools used to build and deploy application software. This article is meant show all the required steps to get a Spark application up and running, including submitting an application to a Spark cluster.
Goal
The goal is to read in data from a text file, perform some analysis using Spark, and output the data. This will be done both as a standalone (embedded) application and as a Spark job submitted to a Spark master node.
Step 1: Environment setup
Before we write our application we need a key tool called an IDE (Integrated Development Environment). I've found IntelliJ IDEA to be an excellent (and free) IDE for Java. I also recommend PyCharm for python projects.
- Download and install IntelliJ (community edition).
Step 2: Project setup
- With IntelliJ ready we need to start a project for our Spark application. Start IntelliJ and select
File->New->Project...
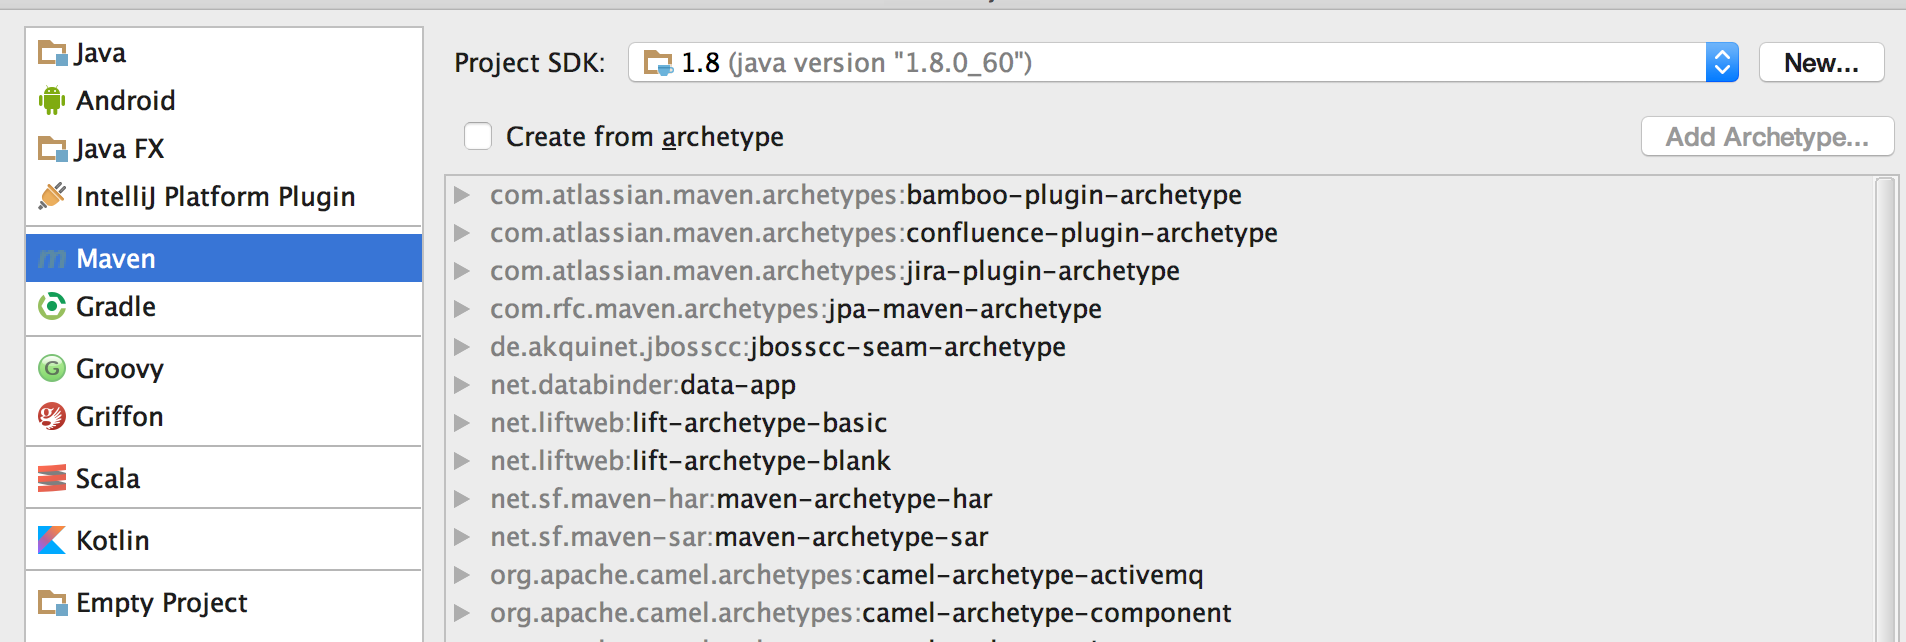
- Select "Maven" on the left column and a Java SDK from the dropdown at top. If you don't have a Java SDK available you may need to download one from Oracle. Hit next.

- Select a GroupId and ArtifactId. Feel free to choose any GroupId, since you won't be publishing this code (typical conventions). Hit next.

- Give you project a name and select a directory for IntelliJ to create the project in. Hit finish.

Step 3: Including Spark
- After creating a new project IntelliJ will open the project. If you expand the directory tree on the left you'll see the files and folders IntelliJ created. We'll first start with the file named
pom.xml, which defines our project's dependencies (such as Spark), and how to build the project. All of this is handled by a tool called Maven.
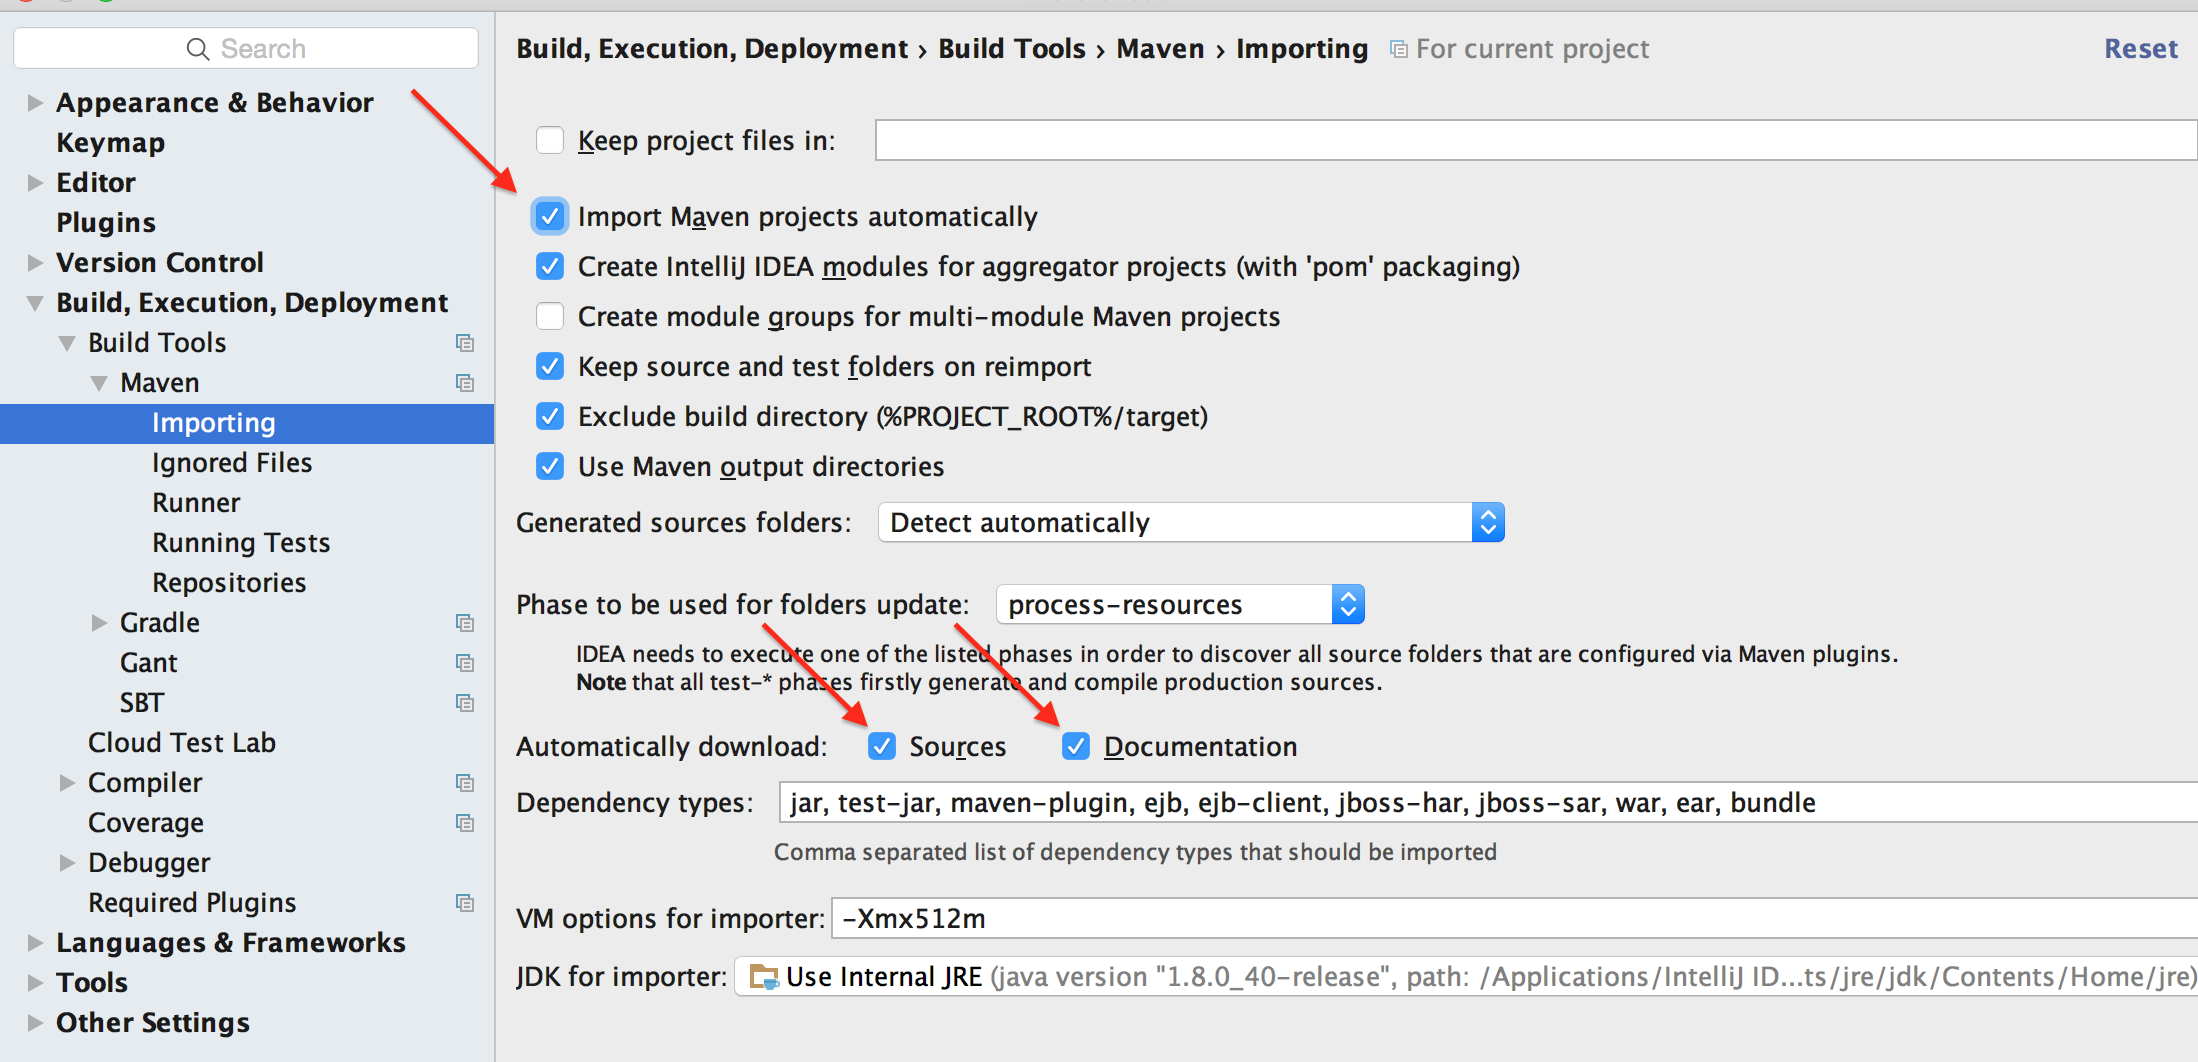
- Open IntelliJ Preferences and make sure "Import Maven projects automatically", and "Automatically download: |x| Sources |x| Documentation" are checked under Build, Execution, Deployment -> Build Tools -> Maven -> Importing, on the left. This tells IntelliJ to download any dependencies we need.

- Add the following snippet to
pom.xml, above the</project>tag. See the complete examplepom.xmlfile here.<dependencies> <dependency> <groupId>org.apache.spark</groupId> <artifactId>spark-core_2.10</artifactId> <version>1.6.1</version> </dependency> </dependencies>
This tells Maven that our code depends on Spark and to bundle Spark in our project.
Step 4: Writing our application
- Select the "java" folder on IntelliJ's project menu (on the left), right click and select New -> Java Class. Name this class
SparkAppMain.
-
To make sure everything is working, paste the following code into the
SparkAppMainclass and run the class (Run -> Run... in IntelliJ's menu bar).public class SparkAppMain { public static void main(String[] args) { System.out.println("Hello World"); } }
You should see "Hello World" print out below the editor window.
-
Now we'll finally write some Spark code. Our simple application will read from a csv of National Park data. The data is here, originally from wikipedia. To make things simple for this tutorial I copied the file into
/tmp. In practice such data would likely be stored in S3 or on a hadoop cluster. Replace themain()method inSparkAppMainwith this code:public static void main(String[] args) throws IOException { SparkConf sparkConf = new SparkConf() .setAppName("Example Spark App") .setMaster("local[*]") // Delete this line when submitting to a cluster JavaSparkContext sparkContext = new JavaSparkContext(sparkConf); JavaRDD<String> stringJavaRDD = sparkContext.textFile("/tmp/nationalparks.csv"); System.out.println("Number of lines in file = " + stringJavaRDD.count()); }
Run the class again. Amid the Spark log messages you should see "Number of lines in file = 59" in the output. We now have an application running embedded Spark, next we'll submit the application to run on a Spark cluster.
Step 5: Submitting to a local cluster
-
To run our application on a cluster we need to remove the "Master" setting from the Spark configuration so our application can use the cluster's master node. Delete the
.setMaster("local[*]")line from the app. Here's the newmain()method:public static void main(String[] args) throws IOException { SparkConf sparkConf = new SparkConf() .setAppName("Example Spark App") JavaSparkContext sparkContext = new JavaSparkContext(sparkConf); JavaRDD<String> stringJavaRDD = sparkContext.textFile("/tmp/nationalparks.csv"); System.out.println("Number of lines in file = " + stringJavaRDD.count()); }
-
We'll use Maven to compile our code so we can submit it to the cluster. Run the command
mvn installfrom the command line in your project directory (you may need to install Maven). Alternatively you can run the command from IntelliJ by selecting View -> Tool Windows -> Maven Projects, then right click on install under Lifecycle and select "Run Maven Build". You should see a the compiled jar attarget/spark-getting-started-1.0-SNAPSHOT.jarin the project directory. - Download a packaged Spark build from this page, select "Pre-built for Hadoop 2.6 and later" under "package type". Move the unzipped contents (i.e. the
spark-1.6.1-bin-hadoop2.6directory) to the project directory (spark-getting-started). -
Submit the Job! From the project directory run:
./spark-1.6.1-bin-hadoop2.6/bin/spark-submit \
  --master local[*] \
  --class SparkAppMain \
  target/spark-getting-started-1.0-SNAPSHOT.jar
This will start a local spark cluster and submit the application jar to run on it. You will see the result, "Number of lines in file = 59", output among the logging lines.
Step 6: Submit the application to a remote cluster
Now we'll bring up a standalone Spark cluster on our machine. Although not technically "remote" it is a persistent cluster and the submission procedure is the same. If you're interested in renting some machines and spinning up a cluster in AWS see this tutorial from Insight.
-
To start a Spark master node, run this command from the project directory:
./spark-1.6.1-bin-hadoop2.6/sbin/start-master.sh -
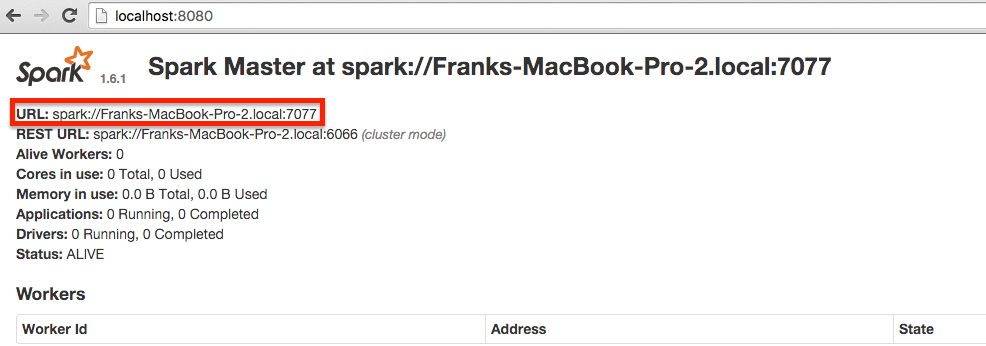
View your Spark master by going to
localhost:8080in your browser. Copy the value in theURL:field. This is the URL our worker nodes will connect to.
-
Start a worker with this command, filling in the URL you just copied for "master-url":
./spark-1.6.1-bin-hadoop2.6/sbin/start-slave.sh spark://master-urlYou should see the worker show up on the master's homepage upon refresh.

-
We can now submit our job to this cluster, again pasting in the URL for our master:
./spark-1.6.1-bin-hadoop2.6/bin/spark-submit \
  --master spark://master-url \
  --class SparkAppMain \
  target/spark-getting-started-1.0-SNAPSHOT.jar
On the master homepage (at
localhost:8080), you should see the job show up:
This tutorial is meant to show a minimal example of a Spark job. I encourage you to experiment with more complex applications and different configurations. The Spark project provides documentation on how to do more complex analysis. Below are links to books I've found helpful, it helps support Data Science Bytes when you purchase anything through these links.
Similar Posts
- Creating a Spark Streaming Application in Java, Score: 0.999
- Spark 1.2.0 released, Score: 0.980
- Spark 1.3.0 released, Score: 0.975
- IPython 3.0 released, Score: 0.956
- Using Jupyter notebooks securely on remote linux machines, Score: 0.908
Comments